Welcome to our latest tutorial on how to make an F-15 Eagle paper airplane jet. This is the perfect activity for any aviation enthusiast or anyone looking for a fun and easy craft project.
Step-by-Step Video Instructions
Download FREE Printable Template for the F-15 Paper Airplane Jet
The printable templates are all available in A4 size, and PDF format. Although some of the templates are double-sided the design and fold lines have been done on the front of the page to accommodate home printers & users that do not have double-sided printers. You can also ask your local print shop to help you out and get the same quality of prints as the examples in the tutorial videos.
The F-15 paper airplane jet, in particular, is a popular design that can be made with just a few simple steps. This design is known for its sleek and aerodynamic design, which makes it perfect for flying. With this guide, we will walk you through the process of creating your own F-15 paper airplane jet, complete with detailed instructions and helpful images.
The F-15 paper airplane jet is a great project for those who are looking for a fun and easy paper airplane to make. The F-15 design is easy to follow, and the finished product is sure to impress. With this guide, you’ll have a beautiful and functional F-15 paper airplane jet in no time.
Materials Needed
To make your F-15 paper airplane jet, you will need the following materials:
You can use a ruler or straight edge to make sure all the edges and lines of your F-15 Eagle are crisp and clean. You can also use a folding block to ensure the creases are true and correct.
The first step in making your F-15 paper airplane jet is to fold the paper in half. To do this, simply take the sheet of paper and fold it in half horizontally, so that the right edge and left edge are aligned. Make sure that the fold is sharp and creased well.
To start to shape the nose of the F-15 paper airplane jet, open up the page and fold the two top corners along folding line Nr.2 onto the centre crease, making a triangle. Do this for both sides.
The mid-section is created by folding the bottom part of the page back up on fold line Nr.4 so it is level with the bottom of the triangle, reviling the flaps for Step 2. Make sure the centre crease for both sections are line-up.
To prepare the F-15 paper airplane jet for the folding of the wing section open up and unfold to Step 3, revealing the full page with the two top corners folded in.
Fold the top outer edge to the centre crease but only crease the top part until it intersects with the bottom of the triangle. Make sure everything is lined up before doing a hard crease. Do the same for the other side and unfold.
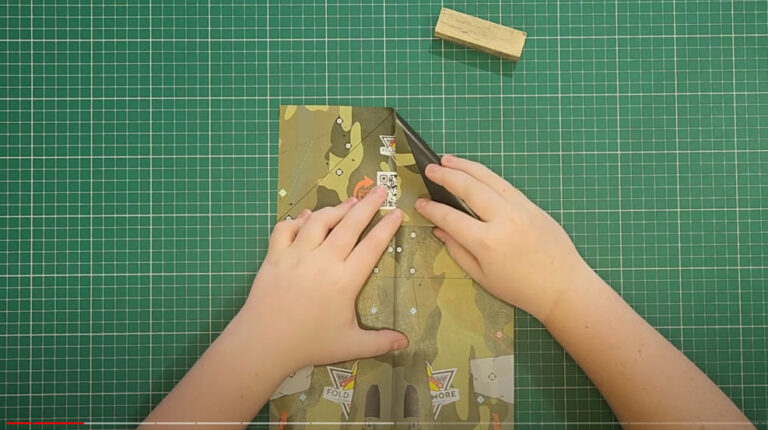
To fold and secure the wings of the F-15 paper jet, fold the page back down on the existing crease from Step 3 and fold back up on the existing crease from Step 4. Using the crease guides made in Step 5 swing the outer edge of the wing inward. A pocket will form on the outer top layer. Open the pocket and squash fold it following the Nr.8 fold lines so the corner of the pocket runs from the centre crease of the plane. Repeat this for the other side.
To finish the cockpit of the F-15 paper plane, fold the bottom section of the flaps to the centre crease following fold line Nr. 11. Do the same for the other side. Fold the top section of the remaining flap to the centre crease following the Nr.10 fold line, forming the cockpit of the F15 jet.
Pick up the F-15 paper airplane jet and fold it in half, upwards, on the existing centre crease. Make the wing crease, folding along the Nr. 13 line from the nose to the back side of the plane. Make sure you stay on the same angle. Now repeat this for the other side and match the two sides up.
Fold the winglets up following the fold guid lines Nr.14. Fold the other side to match.
Fly Your F-15 Paper Airplane Jet
Your F-15 paper airplane jet is now ready to fly! To launch it, hold the plane mid body and give it a good toss into the air with a 30 degree angle. If you have made your folds and secured the edges correctly, your F-15 paper airplane jet should fly smoothly and gracefully through the air. If it tends to dive down the back side of the plane can be adjusted upwards to promote lift.
Tips for a Successful Flight
Use a smooth and glossy paper, it will make the plane glide better and fly farther
Experiment with different folding techniques, you can make small adjustments to the shape of the wings or tail to see how it affects the flight
Try different throwing techniques, like a gentle toss or a firm throw, to see which works best for your F-15
Creating a paper airplane F-15 Eagle is a fun and easy hobby that can be enjoyed by aviation enthusiasts of all ages. With a little practice, you’ll be able to create a plane that soars through the air with ease. So grab a piece of paper and start folding!5


GIPHY App Key not set. Please check settings